
SSMS Tips and Tricks 1-12: Custom report creation

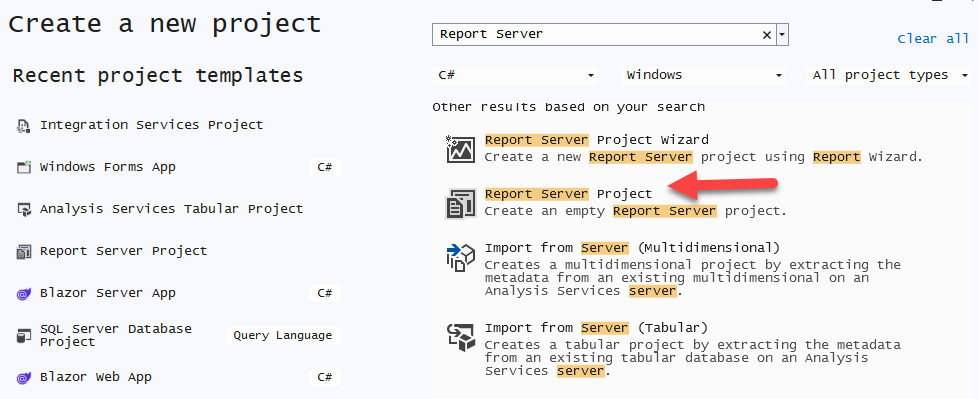
The built-in reports in SQL Server Management Studio are great but you can add your own as well. SQL Server 2005 and later have an option for Custom Reports. Let’s create a report that shows the use of deprecated data types. We’ll use a stored procedure from our free SDU Tools to do that. In SQL Server Data Tools, create a new Report Server project.
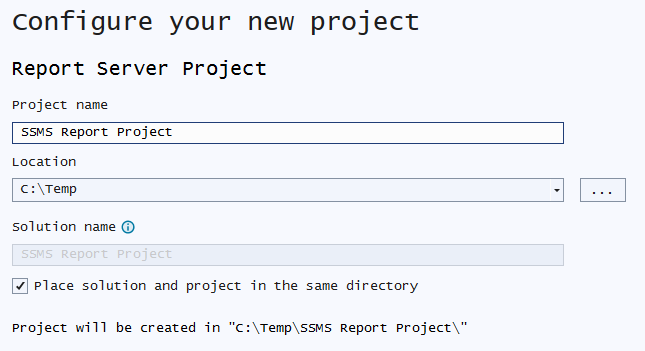
Give the project an appropriate name and location, then click Create.
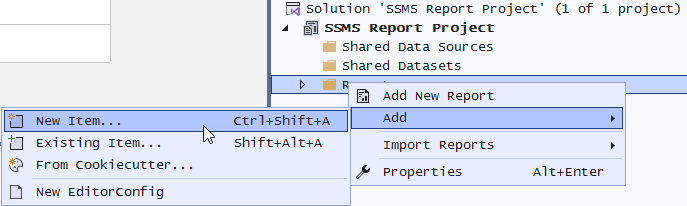
In Solution Explorer, right-click Reports, click Add, then click New Item. (Note: NOT Add New Report)
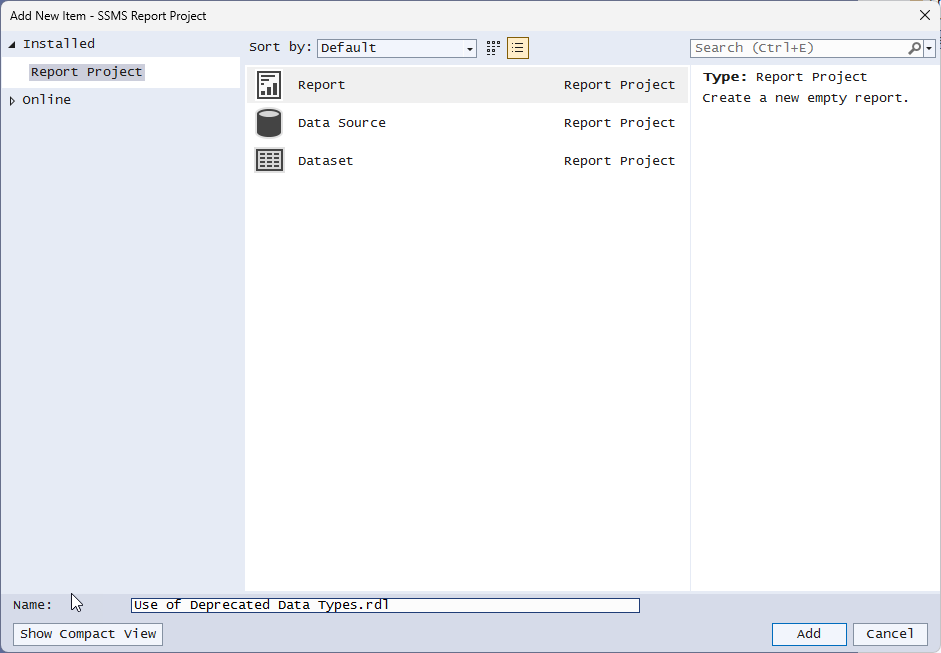
 From the list of templates, choose to create a Report and give it a name.
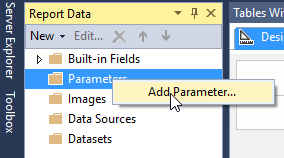
There are a few standard parameters that are passed to your report by Object Explorer. In this case, we’re only interested in the DatabaseName but we’ll create them all anyway. In the Report Datra pane, right-click Parameters and click Add Parameter.
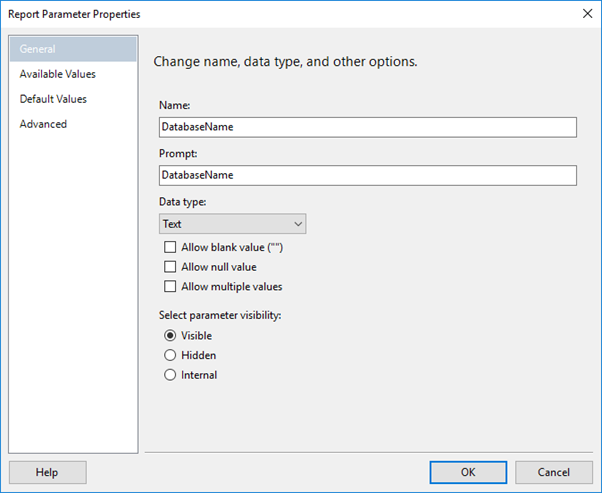
 Complete the parameter details as follows. Don’t choose Allow null value. We’re going to require a database name.
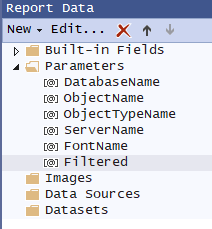
Create parameters for each of the following, ensuring that you do select Allow null value:
• ObjectName (Text) • ObjectTypeName (Text) • ServerName (Text) • FontName (Text) • Filtered (Boolean) Your list should look something like this:
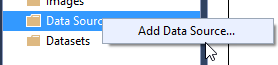
In the Report Data pane, right-click Data Sources, and click Add Data Source.
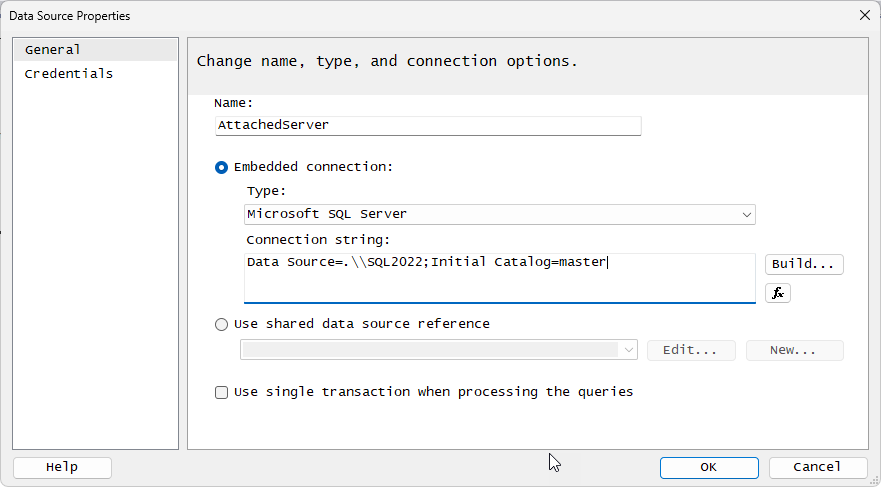
Configure the data source as follows (but note that your server connection might need to be different – mine was connected to a SQL Server 2022 server that I referred to as .\SQL2022 and is shown with a doubled backslash): Click OK to save it.
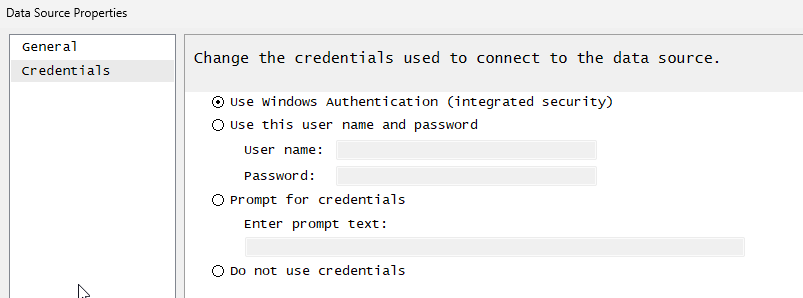
On the Credentials tab, choose the Use Windows Authentication option.
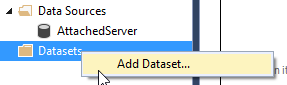
In the Report Data pane, right-click Datasets, and click Add Dataset.
Configure the dataset properties as follows:
 Note that you will need to use whatever query you want to execute. In my case, the SDU Tool called ListUseOfDeprecatedDataTypes is stored in a database called DATABASE_NAME_HERE. (Yes that’s the name of the database).
Also, for the dataset, make sure the Parameters collection is set like this:
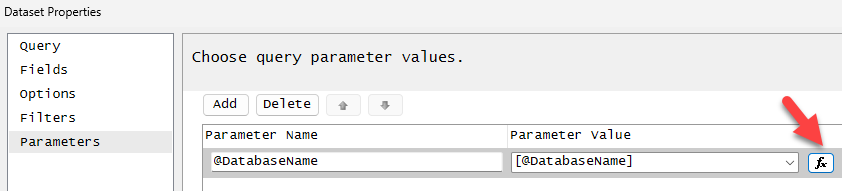
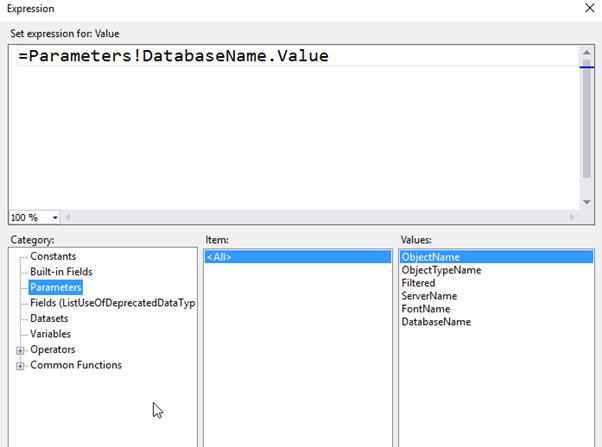
If you need to change it, use the function icon and do this:
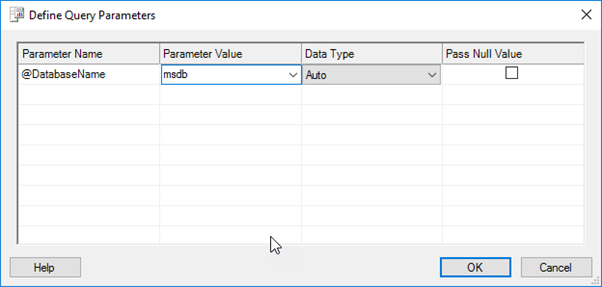
 If you try to save it, you’ll be asked for a parameter value so that the fields can be refreshed. Type msdb for the database name parameter.
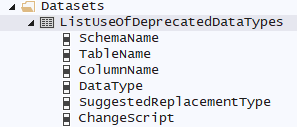
A list of fields should now be present if you expand the Dataset in the Report Data pane. The fields that are listed will depend upon your query.
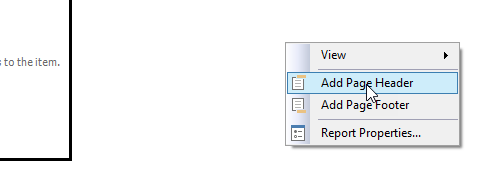
Right-click in the open space of the report and click Add Page Header.
Drag a textbox from the Toolbox into the new header, enter a name, and change its size:
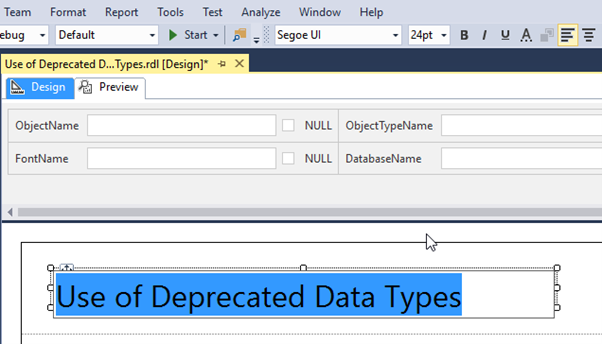
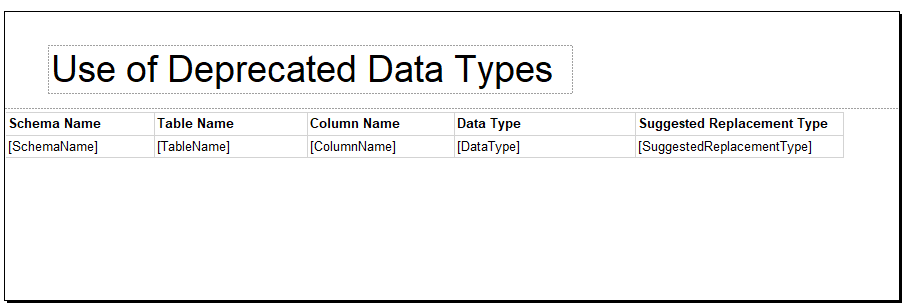
From the Toolbox, drag a table onto the body of the report, then drag the columns out, and resize the table. Bold the header line by selecting it and using the Font setting in the Properties window.
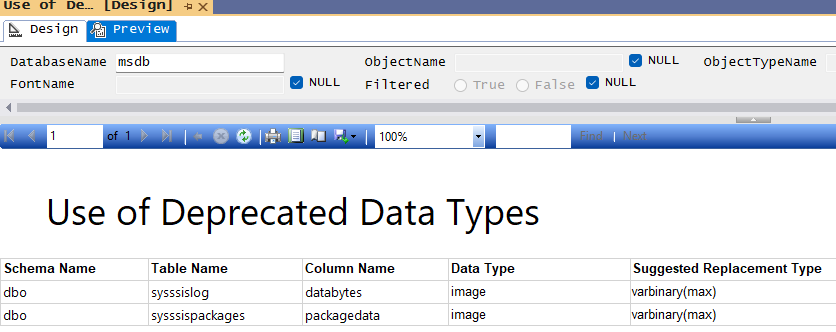
You should now be able to preview the report. Click the Preview tab, enter msdb for the database name, and click View Report.
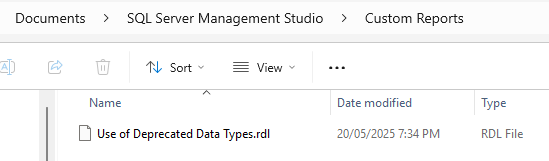
 Now we’re ready to push the report out. Copy the rdl file to the appropriate SSMS folder in your Documents.
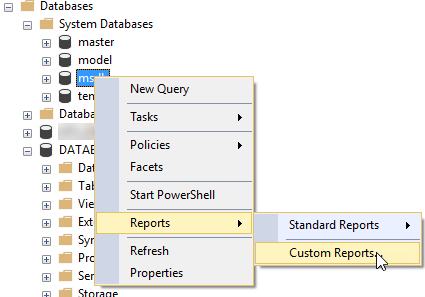
Back in SSMS, right-click the msdb database, then click Reports, then Custom Reports.
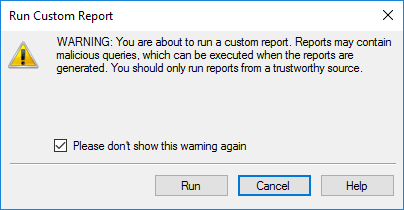
You’ll get a warning which you can choose to not show again.
Then your report should appear.
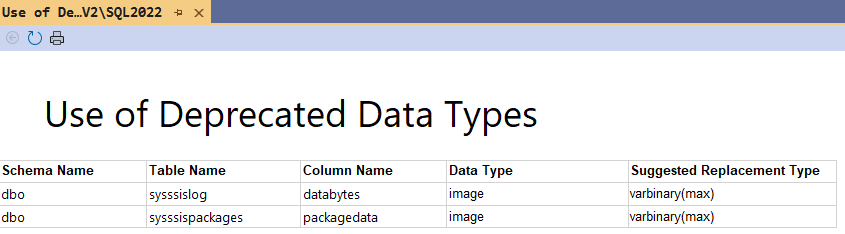
Try it on different databases and you’ll see it works well. Note though that we haven’t displayed the database name. That should be added to the page header but is left as an exercise for you to try.
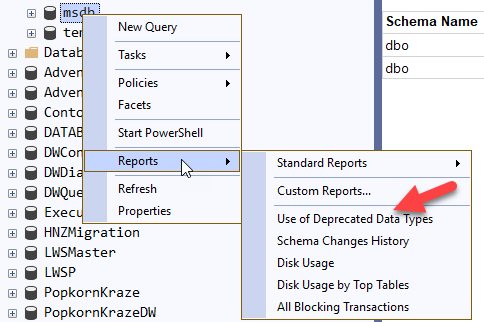
Another thing to notice is that if you try to run it again, it appears in the drop-down list, for any object of the same type.
Custom Reports were a useful addition to SQL Server Management Studio.
2025-05-31