
Adding Good Favicons to your MVC Based Website
When you visit websites, you may or may not have noticed the small icons that appear in the title bar areas. These are called Favicons. Here’s an example of one in Chrome:
In Internet Explorer, they appear in several places:
They are only a small visible aspect of your website but they greatly improve how professional the site looks in a browser. In IE, they also appear when you open a new page:
So, how do you create these, and how do you add them to your site?
I had tried creating them using a variety of icon editors including the excellent IcoFX. However, I could never create really good looking Favicons as I must be a little art-challenged. I’m sure it’s a left-brain/right-brain thing. I’d try to draw them but I’d end up giving up and using something boring like this:

It’s quite hard to create a small version of your company’s logo, etc.
On one of the local mailing lists, our buddy Andrew Coates from Microsoft, pointed out one of their sites that I’d never seen before. It’s awesome for creating favicons by scaling existing images. Here’s how I created the one in the images above:
First Step – Transparent PNG
The first step was to make sure I had a transparent png file that contained the logo that I wanted to use. Even though you could use a white background, it looks much better if it’s transparent. (Skip this if you already have one). To create that, I used Paint.Net (yet another awesome free tool). I loaded the existing logo that had a white background like so:
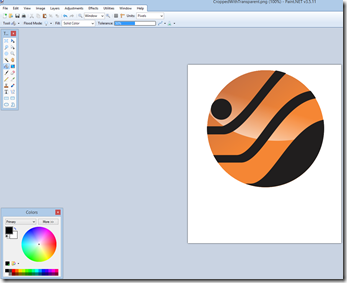
In many of these tools, it’s not so obvious how to make the background transparent. In Paint.Net, all I needed to do was to select the paint bucket as a tool, then use the More option in the color palette, and move the Transparency-Alpha setting fully to the left:
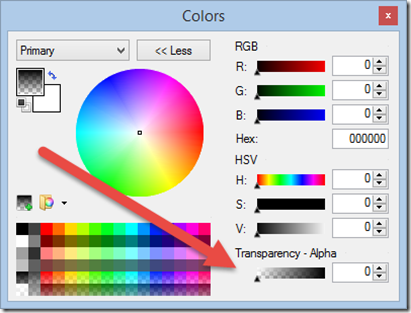
Notice that the primary color now looks transparent. Then I just used the paint bucket tool to change the white to transparent.

Then I saved the file.
Step 2 – Create the Favicon
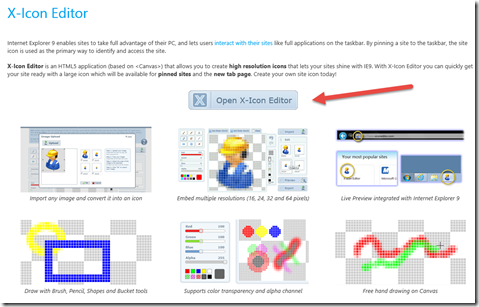
The site that Andrew recommended was the MS IconEditor. Navigate to that site. We then want the icon editor:
Next choose to Import:
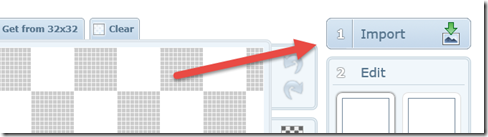
Use the Upload button to bring in the transparent png that was created earlier, and then move and resize the guide window until you get as much of the logo that you want displayed:
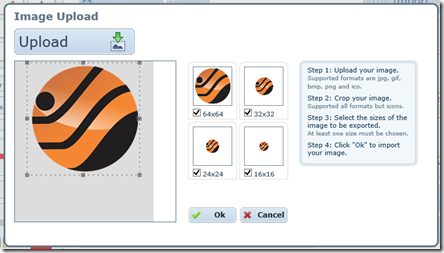
When it looks good, make sure that all four icon sizes are selected via the checkboxes and then click OK. You’ll then see your logo in the main window, and you can choose to export it.
Save the file that is downloaded as favicon.ico.
Step 3 – Add the Favicon to your MVC Project
Copy the icon file into the root folder in your MVC project, and make sure you have included the file in the project. James Green pointed out to me that many older browsers still go looking for the specific filename favicon.ico and in the root folder of the website, so it sounds like good advice to always place them there.
Finally, add a reference to the icon file in your _Layout.cshtml file in the head section:

And you’re done. Enjoy!
2014-02-28